
Knowing how long potatoes take to grow is key to a successful harvest, preventing you from digging too early or too late. The timeline isn't fixed; it depends entirely on the potato variety you plant and your local growing conditions. A common mistake is waiting for a specific date instead of watching for the plant's own signals, like flowering for new potatoes or vine die-back for storage spuds.
Editor’s note: This guide covers the typical growth cycle for potatoes. When harvesting, always discard any potatoes with significant greening on the skin, as this indicates the presence of solanine, a natural toxin. Proper hilling during the growing season is the best way to prevent this.
Key Takeaways
- Your potato harvest timeline is primarily set by the variety you choose, ranging from 70 days for early types to over 120 for late-season storage potatoes.
- For small 'new' potatoes, you can start harvesting a few weeks after the plants begin to flower, which is a key visual cue.
- A common mistake is harvesting storage potatoes right after the vines die; you must wait another 2-3 weeks for the skins to properly 'set' in the ground.
- Consistently high soil temperatures above 77°F (25°C) can halt tuber growth, so mulching can help moderate soil temperature in warmer climates.
The 70- to 120-Day Potato Growing Timeline
1. From Planting to Harvest: The Average Range
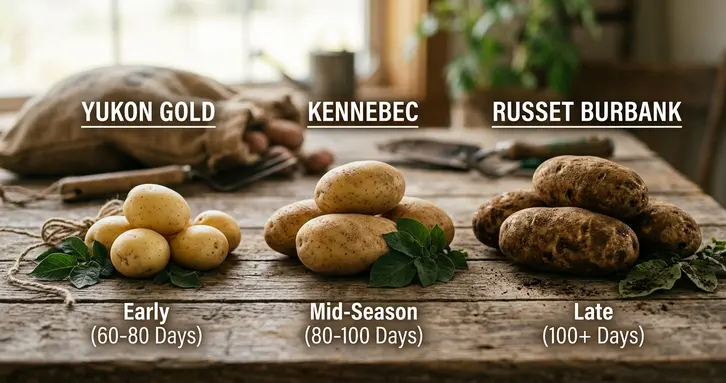
The total time from planting to harvest for potatoes typically ranges from 70 to 140 days, largely depending on the specific cultivar. Early-maturing varieties, such as 'Yukon Gold', are ready in 70-90 days. Mid-season types like 'Kennebec' take 90-110 days, while late-season storage potatoes, including 'Russet Burbank', need 110-140 days. Optimal soil temperatures are crucial: plant seed potatoes when soil is 45-50°F to prevent rot, and tuber development thrives between 60-70°F. Sustained temperatures above 80°F can inhibit tuber growth.
For "new" potatoes, you can harvest around 60 days after planting, often when plants begin to flower, though these have thin skins. For mature, storage-ready potatoes, wait until the plant's vines naturally yellow and die back (senesce), which indicates the tubers have fully matured and their skins have "set."
2. The Three Levers: Variety, Climate, and Care
The total time potatoes take to grow, from planting to harvest, is a direct result of three key factors: the variety you choose, your local climate, and the care you provide. Cultivar selection is paramount, with early-season types maturing in 75-90 days, mid-season in 95-110 days, and late-season varieties needing 120-140 days.
Climate, especially soil temperature, plays a critical role; optimal tuber initiation occurs between 60-68°F (15-20°C), while temperatures consistently above 77°F (25°C) can halt tuber development entirely for optimal growing conditions. Proper care, including consistent moisture, hilling, and adequate potassium, helps the plant progress efficiently. Without these, even a fast-maturing variety can be delayed or yield poorly.
How Potato Variety Dictates Your Timeline
1. Early, Mid, and Late-Season Cultivars
Potato cultivars are categorized by their maturity period, directly influencing your harvest timeline. Early-season varieties, like 'Yukon Gold' or 'Norland', mature in 70-90 days, yielding smaller potatoes with thinner skins best suited for fresh eating. Mid-season types, such as 'Kennebec', take 90-110 days, offering a good balance of yield and moderate storage potential.
For long-term storage, late-season varieties like 'Russet Burbank' are ideal, requiring 110-140+ days to develop larger tubers with robust, thick skins. These longer-season potatoes allocate more time to starch accumulation and skin setting, which is crucial for their superior storage characteristics. Gardeners in short-season climates often choose early or mid-season types, while those aiming for a continuous supply might plant a mix.
2. Determinate vs. Indeterminate: Growth Habit and Harvest Window
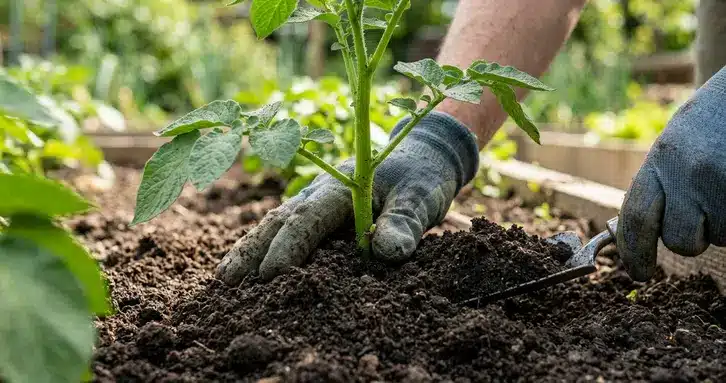
Potatoes are categorized by their growth habit: determinate or indeterminate, which directly affects their harvest timeline and how you cultivate them. Determinate varieties produce tubers in a single, concentrated layer near the soil surface. They mature relatively quickly, typically in 70-90 days, offering a defined, shorter harvest window. Their compact growth makes them well-suited for container gardening, often requiring only one hilling at planting.
In contrast, indeterminate potatoes develop tubers in multiple layers along the stem as the plant grows upwards. These varieties have a longer growing season, usually 90-120+ days, and can continue producing until frost. To maximize yield, indeterminate types require consistent hilling throughout the season to cover new stolons. This allows for a prolonged or staggered harvest, where you can carefully 'rob' new potatoes without disturbing the main plant, or wait for a larger, end-of-season harvest. Insufficient hilling is a common mistake that limits their potential yield.
3. Choosing a Variety for Your Growing Season
To ensure a successful potato harvest, select varieties that align with your local frost-free growing season. Potato varieties are categorized by their maturity period:
- Early-season varieties mature in 70-90 days, ideal for shorter seasons or an early crop. Examples include 'Yukon Gold' and 'Norland'.
- Mid-season varieties take 90-110 days, offering a balanced yield over a moderate period, such as 'Kennebec' or 'Superior'.
- Late-season varieties require 110-140 days or more, best for regions with long growing seasons and for potatoes intended for long-term storage, like 'Russet Burbank'.
Planting a late-season variety in an area with fewer than 110-120 frost-free days risks underdeveloped tubers and poor storage quality, as the plants may be killed by frost before they can fully mature and set their skins. Gardeners with longer seasons, however, can plant a mix of varieties to extend their fresh harvest window University of Minnesota Extension.
Key Growth Stages and How to Manage Them
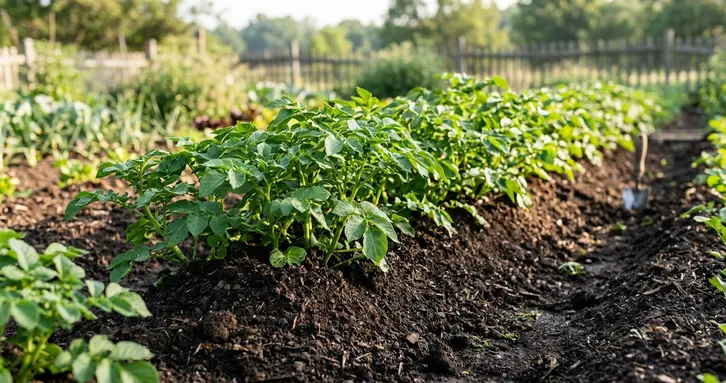
1. Sprouting and Foliage Growth (Weeks 1-4)
Potato growth begins with sprouts emerging from the seed tuber's eyes, followed by the plant breaking through the soil surface. This initial phase, lasting approximately 1 to 4 weeks, focuses on rapid vegetative growth. The plant develops a robust root system, stems, and leaves, which are crucial for establishing its photosynthetic capacity and accumulating the biomass needed for later tuber development.
For successful sprouting, plant seed potato pieces when optimal soil temperatures are consistently between 45-50°F (7-10°C); colder soils significantly increase the risk of seed piece rot. Gardeners can "chit" or pre-sprout seed potatoes indoors in diffused light for a 10-14 day head start, though this benefit is most pronounced in short growing seasons. Maintaining a soil pH of 5.0-6.5 from the start is also vital to suppress common potato scab.
2. Tuber Formation and Bulking (Weeks 5-12)
Around 5-7 weeks after planting, potatoes begin tuber initiation (Stage III), where small tubers form on underground stolons. This process, along with the subsequent tuber bulking (Stage IV), is highly sensitive to soil temperature and moisture. Optimal soil temperatures for tuber development are 60-68°F (15-20°C); temperatures above 77°F (25°C) can halt growth entirely, as the plant shifts energy away from tubers to foliage.
During the bulking stage, which is the longest, the plant dedicates energy to enlarging tubers with starch and water. Provide consistent soil moisture, aiming for 1-2 inches of water per week through deep, infrequent watering. Ensure adequate potassium for starch accumulation, but avoid excessive nitrogen, which can reduce tuber yield. Continue hilling to protect developing tubers from sunlight, preventing greening and solanine formation. Inconsistent watering can also lead to quality issues like growth cracks.
3. Vine Die-Back: The Final Signal for Maturation
The final stage of potato growth is signaled by the natural die-back of the vines, which can appear as yellowing, browning, and drying. This process, whether natural senescence or induced vine killing, marks the end of tuber bulking and the beginning of maturation. During this critical phase, the potato skins thicken and "set," forming a durable protective barrier. This skin set significantly improves the tubers' resistance to bruising, disease, and moisture loss, all of which are essential for successful long-term storage.
After the vines have fully died back, allow the tubers to remain in the ground for an additional 2 to 3 weeks before harvesting. This underground "curing" period is crucial for proper skin development. Harvesting too early, before the skins have adequately set, will result in easily damaged tubers that are more susceptible to rot and have a shorter storage life.
Harvesting: When and How to Dig
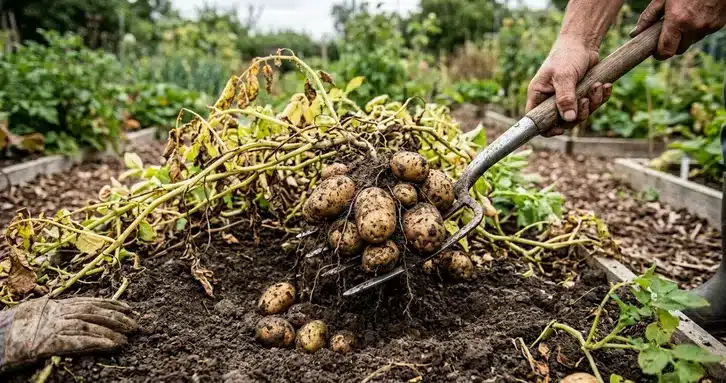
1. Harvesting 'New' Potatoes vs. Full-Sized Storage Spuds
Harvesting 'new' potatoes means digging them when they are immature, typically 2-3 weeks after the plant flowers, or when tubers are 1-2 inches in diameter. These have thin skins and a delicate flavor, best consumed soon after harvest. To collect them, gently dig around the plant's perimeter to remove a few tubers, leaving the main plant to continue growing.
For full-sized storage potatoes, wait until the vines have completely yellowed and died back naturally. Allow an additional 2-3 weeks after vine death for the potato skins to thicken and "set." This process, called periderm development, is crucial for long-term storage, as it creates a protective barrier against moisture loss and pathogens. Harvest when the soil is dry to minimize bruising and disease, digging carefully several inches from the main stem. After digging, let them air dry on the soil surface for a few hours, away from direct sun, before moving them to a curing location. Do not wash them before curing or storing; gently brush off excess soil.
2. What Happens if You Harvest Too Early or Too Late?
Harvesting potatoes at the wrong time directly impacts their quality and storage life. Digging tubers too early results in smaller potatoes with thin, easily scuffed skins and lower starch content. These immature potatoes are prone to moisture loss and rot, making them unsuitable for long-term storage. While small, tender "new potatoes" can be harvested early, they must be consumed quickly.
Conversely, harvesting too late increases the risk of tubers encountering diseases like late blight, damage from ground-dwelling pests, and potential freeze damage in regions with early frosts. Prolonged exposure of tubers to sunlight, often due to insufficient hilling or late harvest after soil erosion, can lead to greening, which indicates the formation of solanine, a naturally occurring toxic alkaloid. To ensure good storage quality, wait until the potato vines have fully died back, then allow an additional 2-3 weeks in the ground for the potato skins to thicken and cure. This critical "skin set" process toughens the periderm, creating a protective barrier that significantly enhances resistance to physical damage, dehydration, and pathogen entry during storage. Avoid consuming excessively greened potatoes.
Final Thoughts
Ultimately, the potato plant itself tells you how long it needs to grow. Instead of sticking to a rigid calendar, learn to read the signs—from flowering to vine die-back. Matching the right potato variety to your climate is the first step, but observing your plants is what ensures a perfectly timed harvest. Patience after the vines die is the key to potatoes that will store well for months.
Use these harvest signals to check on your potato patch this week.
About the Author
Julia Wilson is a hands-on gardener and editor for LeekGarden who focuses on practical, research-aware guidance for real home gardeners. Her writing combines field-level observation of common homeowner mistakes with extension-style references to make growing decisions easier. She emphasizes watching the plant's own signals over sticking to a rigid calendar.
About Us
LeekGarden.com is a passionate gardening blog created by Julia Wilson, a dedicated gardener from Texas who started her journey with a small vegetable garden to stretch her family's grocery budget while raising two kids. Here, you'll find practical tips, honest product reviews (like the best leaf blowers and hand pruners), and real-life stories from successes and failures in the garden. Whether you're a beginner dipping your toes into soil or a hobby gardener seeking weekend projects, this site aims to inspire you to connect with nature, grow your own food, and enjoy the therapeutic benefits of gardening. Pull up a chair, explore the guides, and get your hands dirty – let's grow together!